As the title of this post is saying we will tell you how to block ads in Android Device without downloading any extra app. Before proceeding please note that this method will work only on Android version 9 (P) or above. Which means it will work for ~40% users looking from market share right now. You can find your device’s android version by going to “About” section in the settings of your device. This exact process can vary from one device manufacturer, but you can often find it pretty easily.
Once you have confirmed you’re running Android 9 or higher, you need to look for the Private DNS setting. Here’s how to do so.
Open up your Setting menu, and if you have the search function embedded in there, you can use that to search for Private DNS or DNS. Otherwise, you can try looking in your networking/wireless or connection setting on your phone.
In the case of my OnePlus 7T, the setting was located in Wi-Fi & Internet. On my Pocophone F1, the setting was located in connection & sharing.
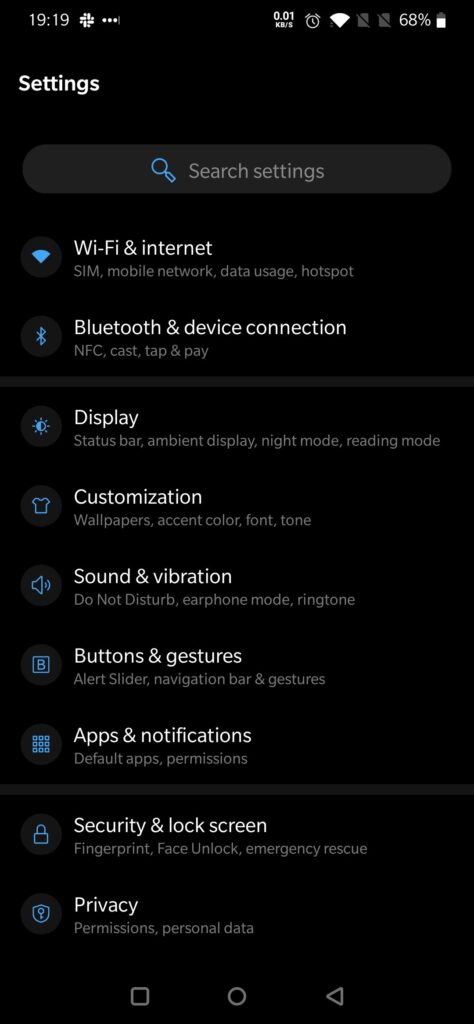
Settings 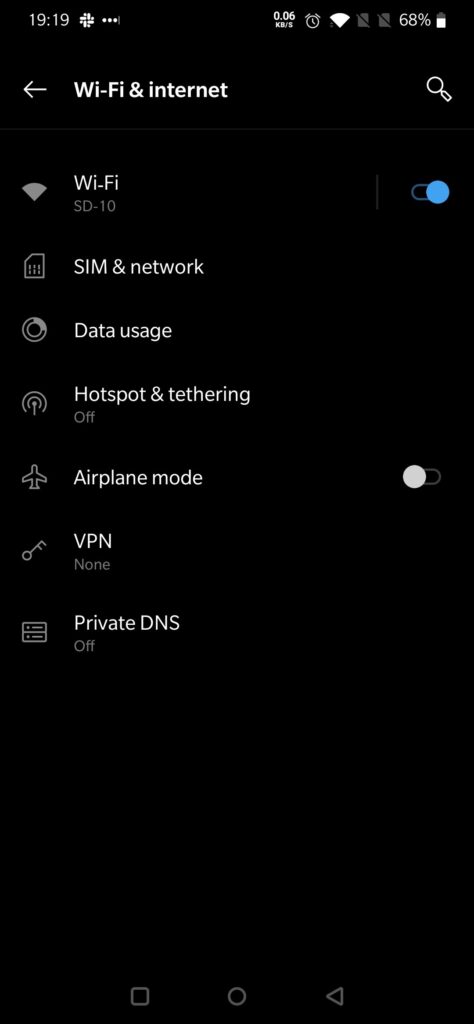
Wifi and Internet
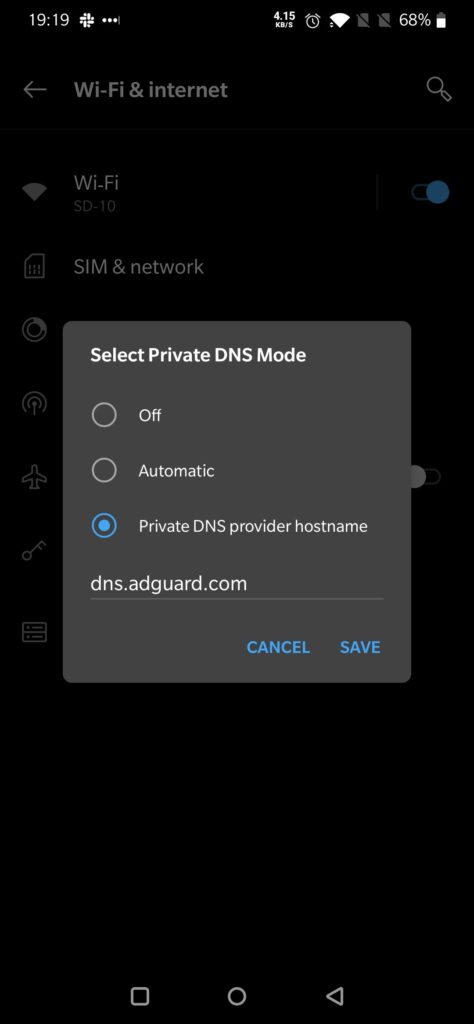
Once you find the setting, tap on it and a new box will open up, prompting you to enter a Private DNS Mode.
Choose Private DNS provider hostname and enter dns.adguard.com and tap on save.
Private DNS 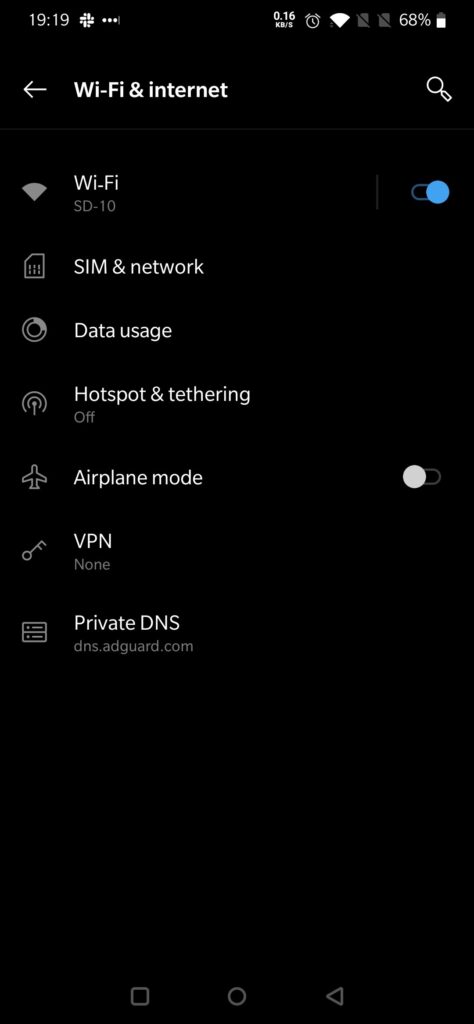
This will now enable a system-wide setting for your DNS settings to be rerouted through adguard which will block all the ads urls (i.e. Google ads). While this won’t completely get rid of your ads in an app, it can reduce their frequency of occurrence. In my case it didn’t block ads in YouTube but I’m not seeing any ad in my browser or other apps that I use.
Beware!
It’s also worth mentioning that this could also break certain apps. When tested with TurboVPN free version, the app would refuse to connect me to a server. When I turned off the Private DNS, I was able to connect to the VPN once more.
If you have gotten tired of in-app ads, this little DNS hack is very handy. It works on virtually any Android phone or tablet device, as long as it is running Android 9 or above.